


Updated: May 17, 2026 | Reading time: approx. 4 minutes
In this illustrated guide, we will show you how to configure airOS components such as the Ubiquiti PicoStation, Rocket, Bullet, or NanoStation to act as a standard WiFi Access Point.
1. Accessing the airOS Web Interface
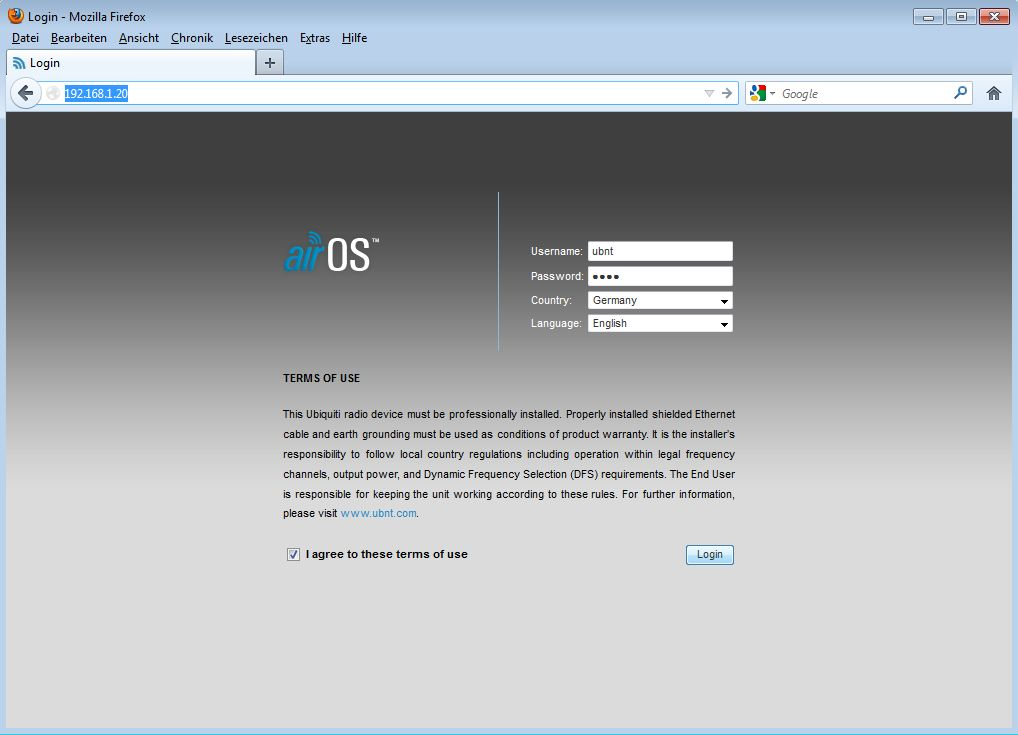
Connect the Ubiquiti device to power via the "POE" port and your computer via the "LAN" port. Open your browser and type in 192.168.1.20.

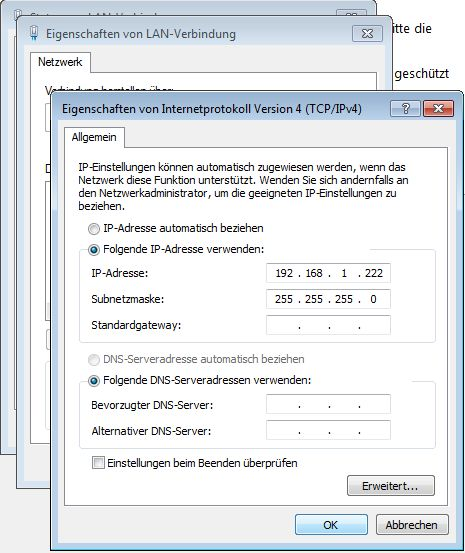
If the page cannot be found, assign a static IP address to your network card (e.g., 192.168.1.10).
Log in using ubnt and ubnt.
2. Adjusting Wireless Settings
Switch to the Wireless tab.
- Wireless Mode: Select Access Point. (Do NOT check WDS).
- SSID: Enter your desired WiFi name.
- Security: Set to WPA2-AES and assign a password.
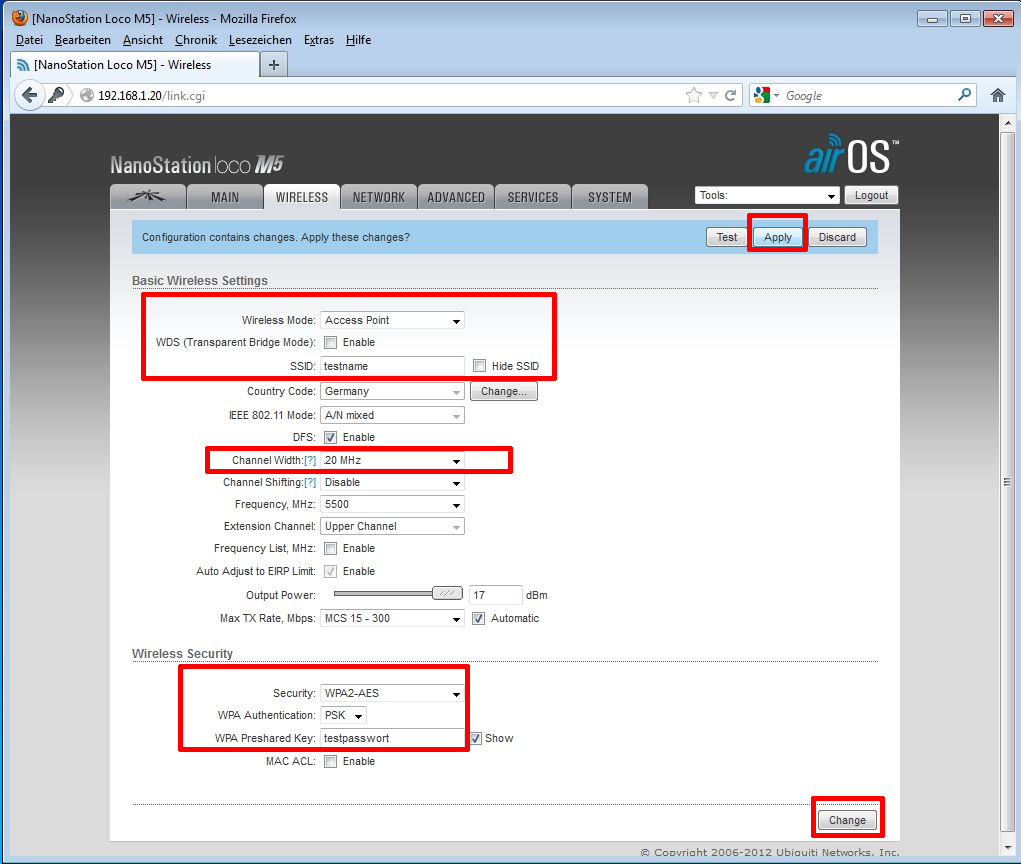
Click Change and Apply.
3. Important: Disable airMAX!
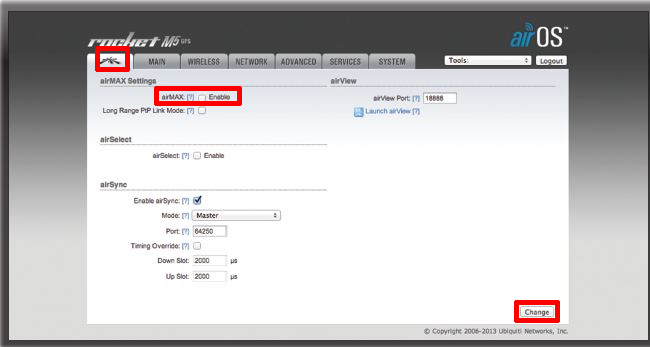
Click on the Ubiquiti logo in the left menu and uncheck airMAX Enable! Regular devices cannot connect if it is enabled.
4. Setting Bridge Mode
Switch to the Network tab.
- Network Mode: Select Bridge.
- Management IP Address: Change this to DHCP.
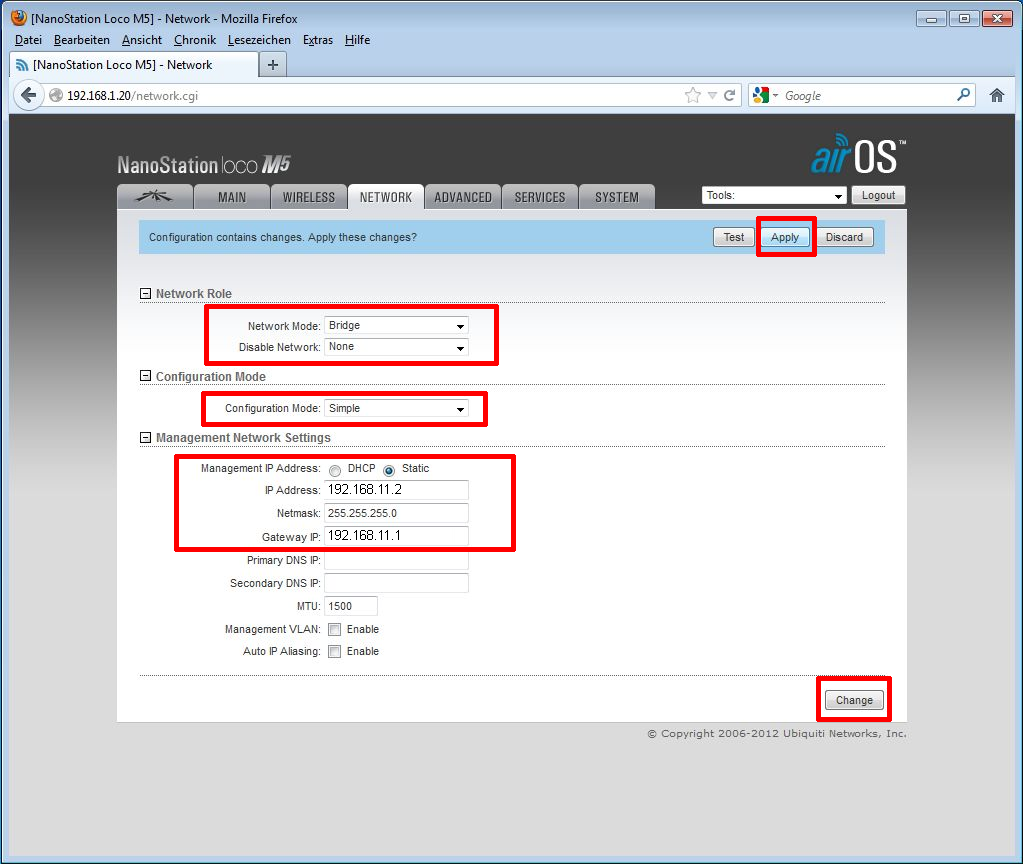
Save with Change and Apply. Now connect the device to your main router.
FAQ: Ubiquiti Access Point
Why can’t my phone connect to the WiFi?
Did you remember to disable the proprietary airMAX protocol in the left-hand menu? Without disabling it, standard devices cannot understand the Ubiquiti WiFi signal.