


Updated: May 17, 2026 | Reading time: approx. 5 minutes
In this guide, we will show you how to set up the UniFi Controller and establish a "Wireless Uplink" (mesh connection) between multiple UniFi Access Points to expand your WiFi without running additional cables.
1. Controller Installation and Initial Setup
Run the UniFi Controller installation file on a computer in your network. Connect all UniFi Access Points to your network or router (they do not need to be in their final locations yet).
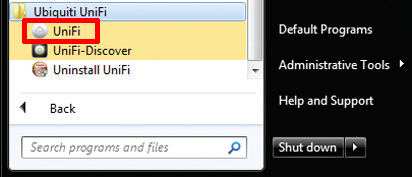
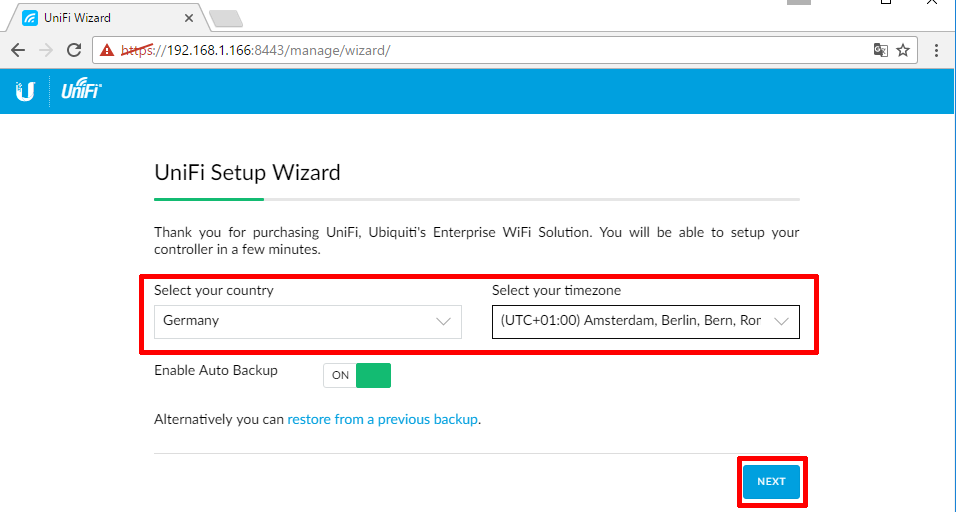
Launch "UniFi" on your computer. First, you will set the country and time zone.
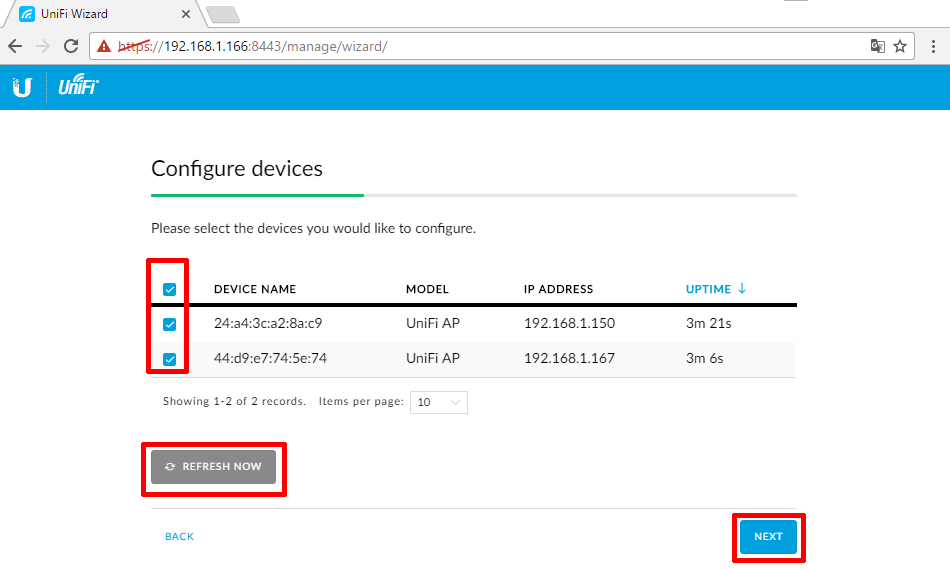
If the UAPs are connected, they will appear in the list. Select them and proceed.
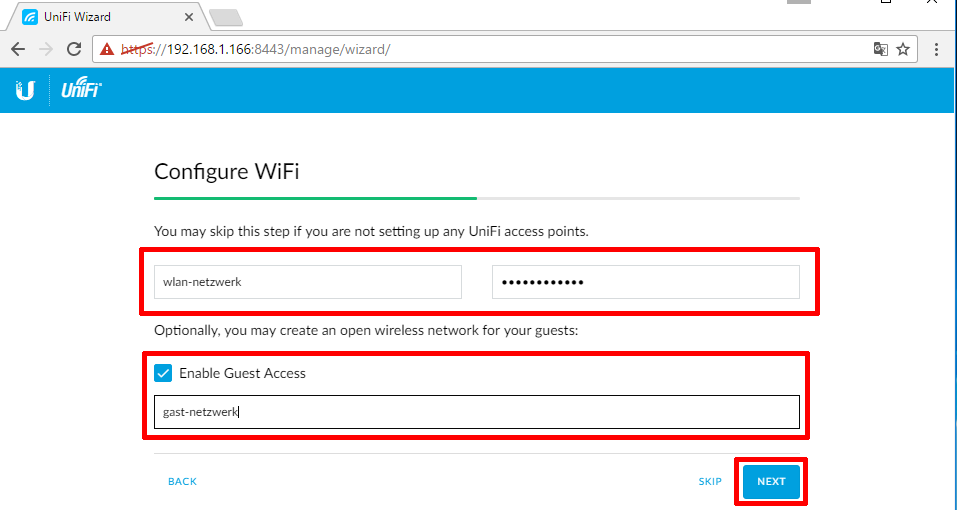
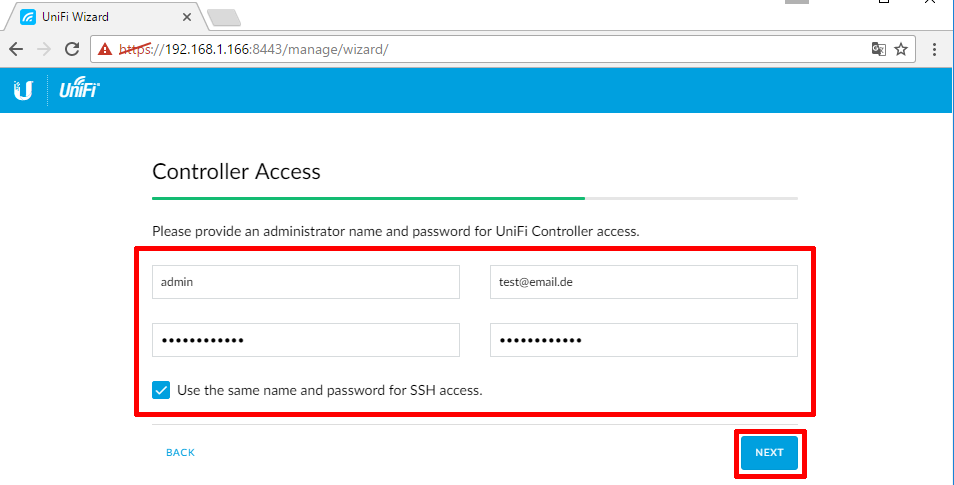
Specify the desired network name (SSID) and password. You can also enable a guest network here.
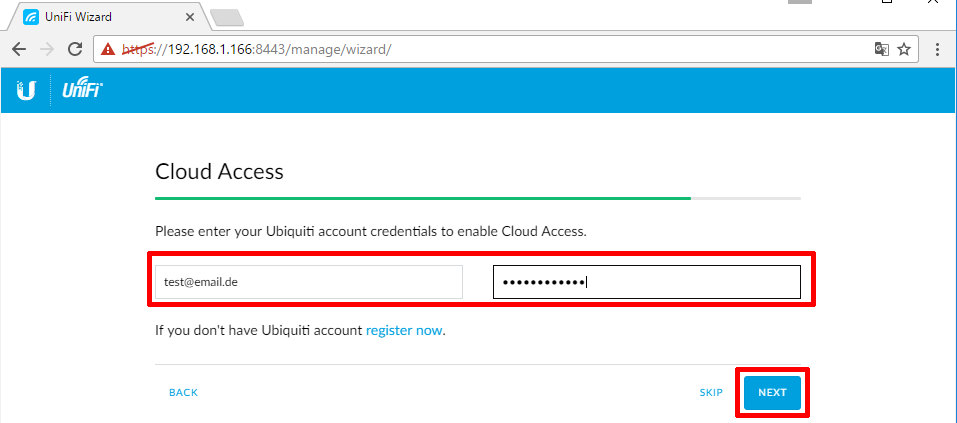
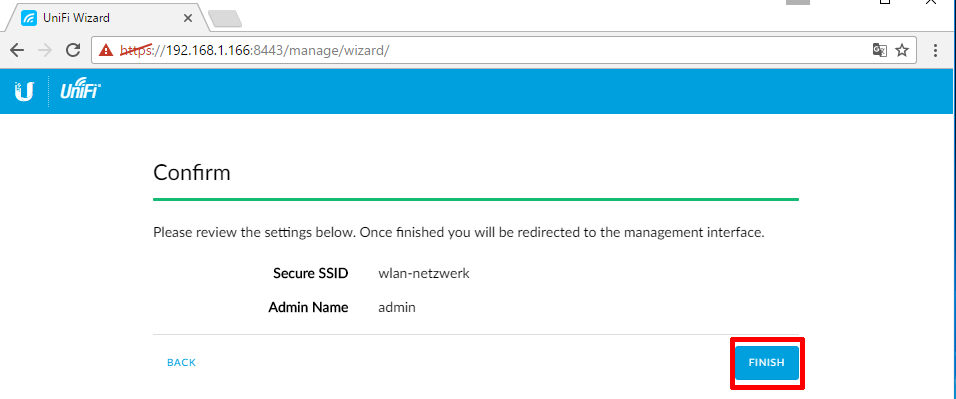
Enter the UniFi Cloud login details and complete the setup by clicking "Finish".
2. Advanced Controller Settings
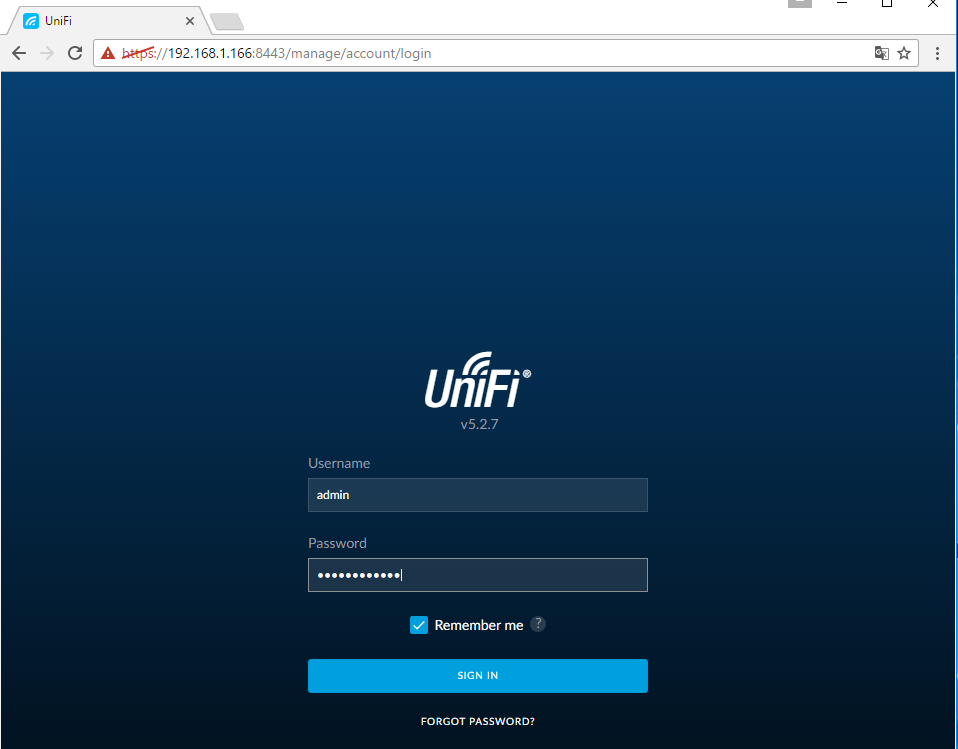
Log in with the controller credentials.
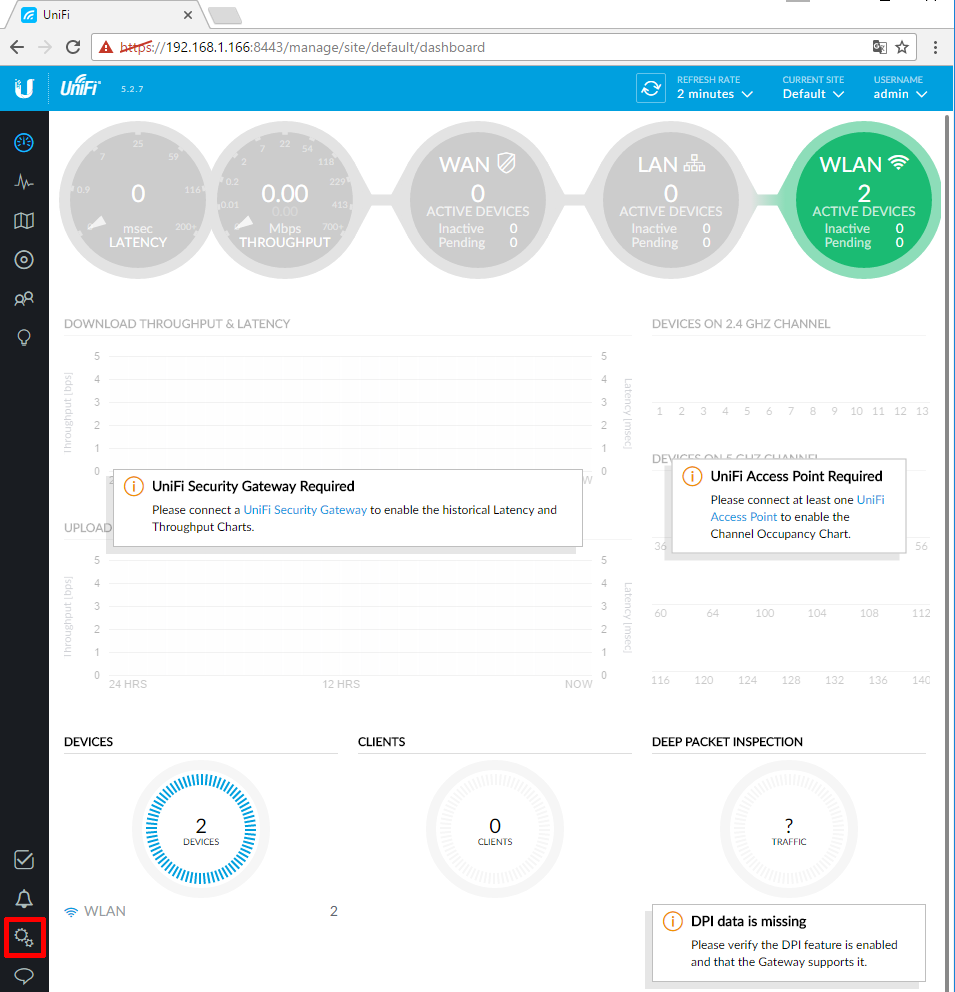
You will find the settings in the bottom left corner under the gear icon.
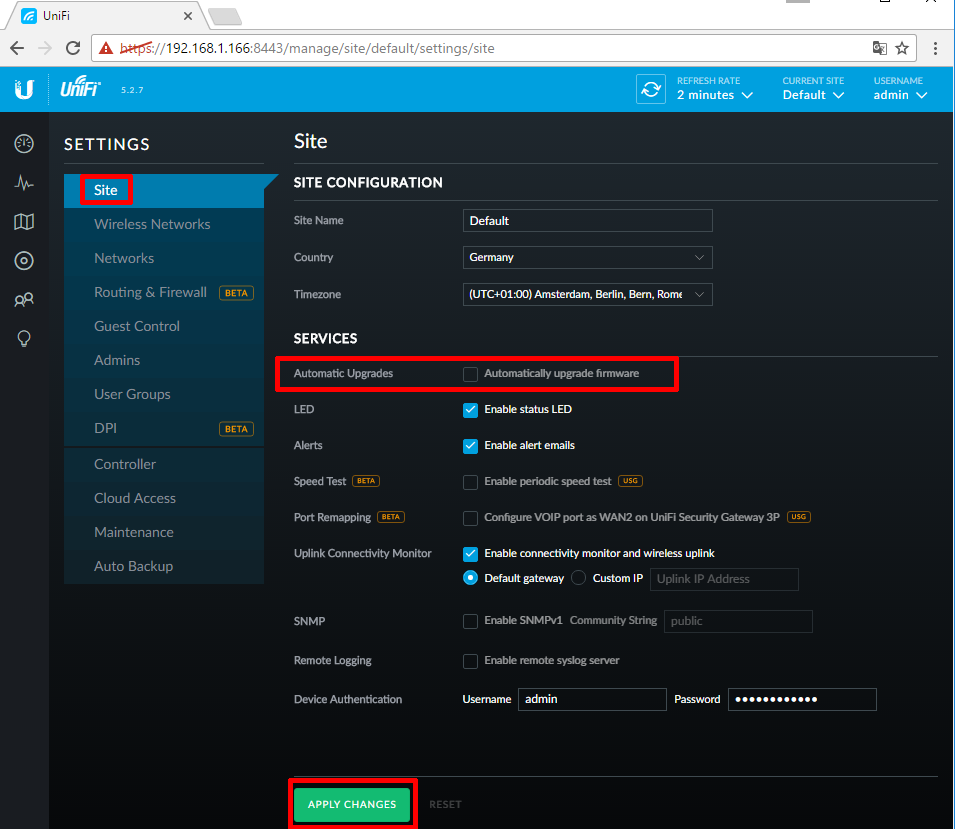
Under "Site", you can activate automatic updates.
Under "Wireless Networks", you manage your WiFi and guest networks.
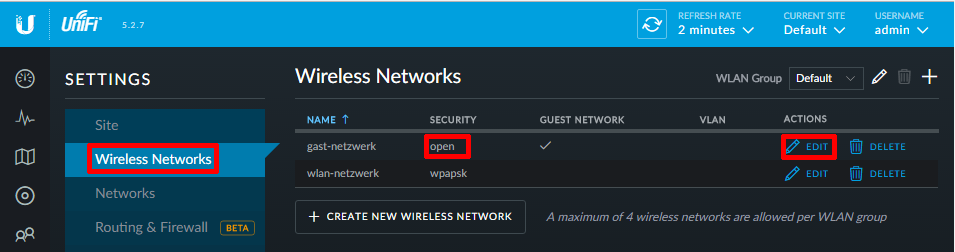
Under "Security", you set the encryption and password.

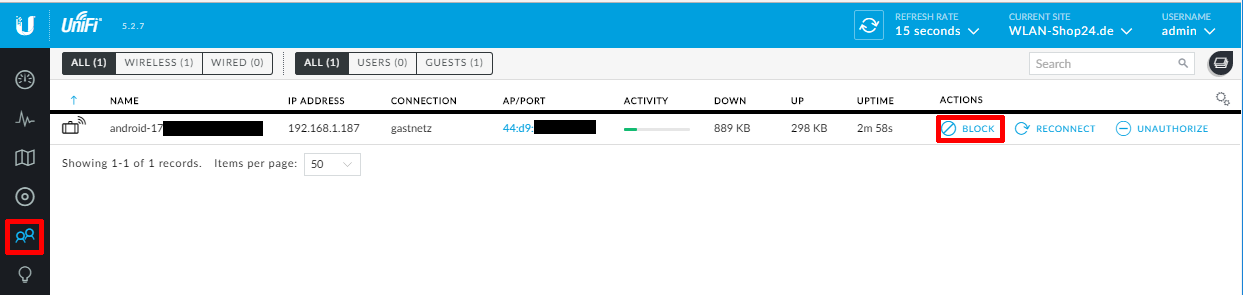
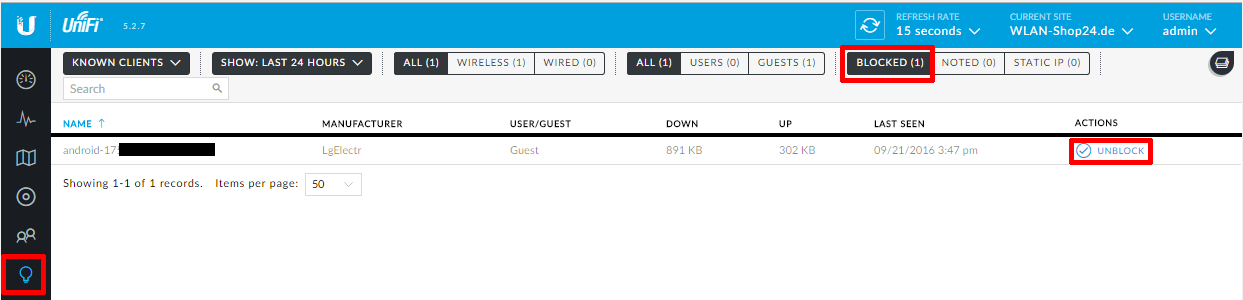
Under "Clients", you can view all connected devices or block them.
3. Enable Wireless Uplink
Once all UAPs have received the settings (LED solid blue/green), disconnect the UAP you want to use wirelessly from the LAN network and place it at its designated position (connected only to power).
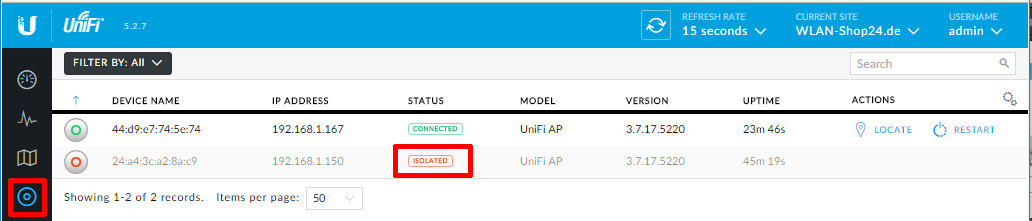
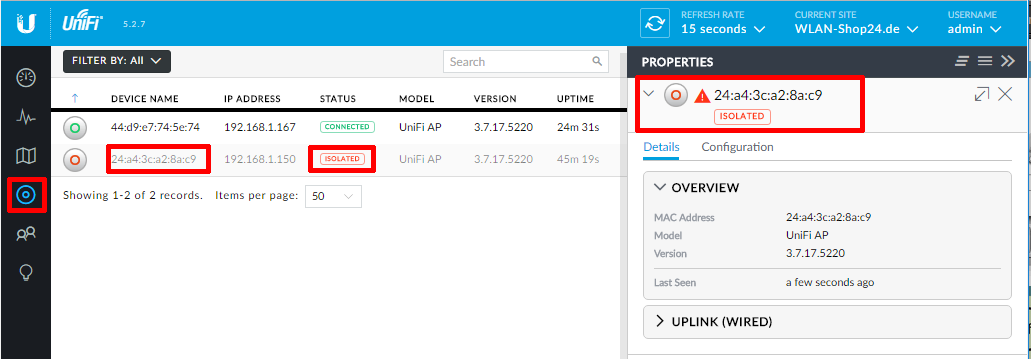
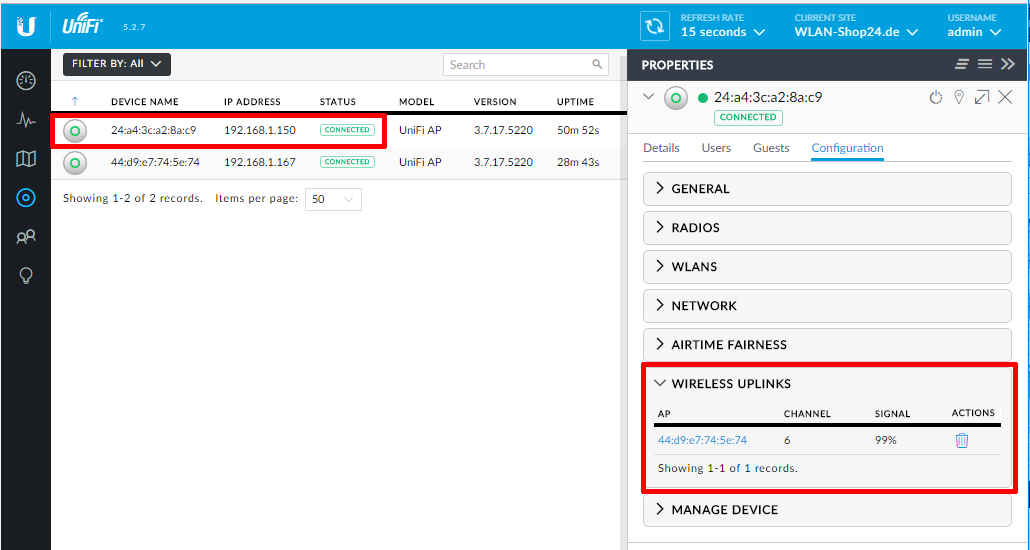
In the interface, it will appear as "Isolated". Click on it to open its settings.
Under "Configuration", you will find "Wireless Uplink". Choose the wired UAP with the best signal percentage and click the chain link icon.
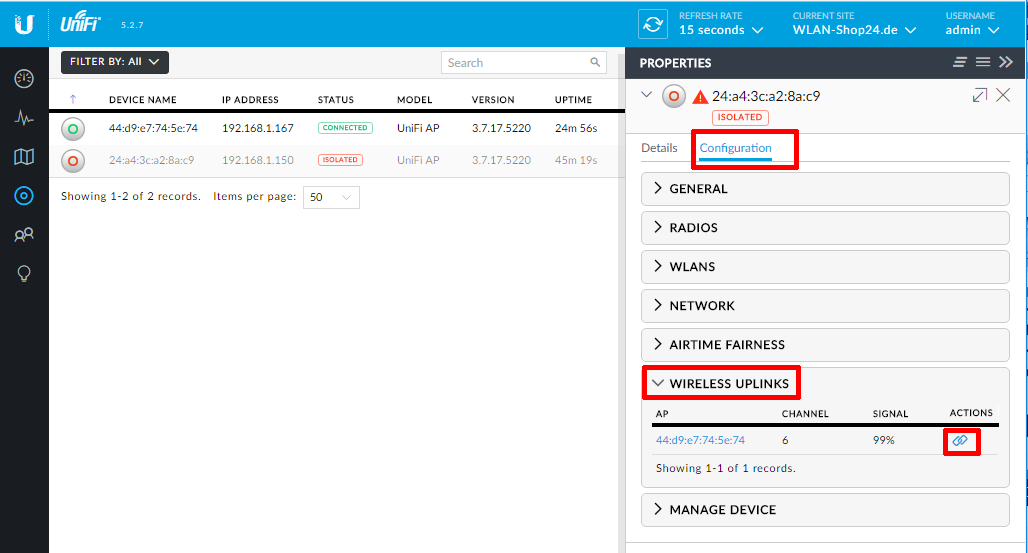
After a few minutes, the devices will connect, and the status will change to "Connected (Wireless)".
FAQ: UniFi Wireless Uplink
What exactly is a Wireless Uplink?
It allows UniFi Access Points to connect wirelessly to each other (mesh network). You only need a power outlet at the target location, no Ethernet cable.