


Updated: May 17, 2026 | Reading time: approx. 5 minutes
If you insert a SIM card without an active PIN request into the SIM1 slot, you often do not need to configure anything and can start surfing immediately via the LAN ports. To adjust settings, follow this guide.
1. Initial Configuration and Login
Connect to the RUTX09 via network cable. Open your browser and navigate to 192.168.1.1. Login: admin / admin01.
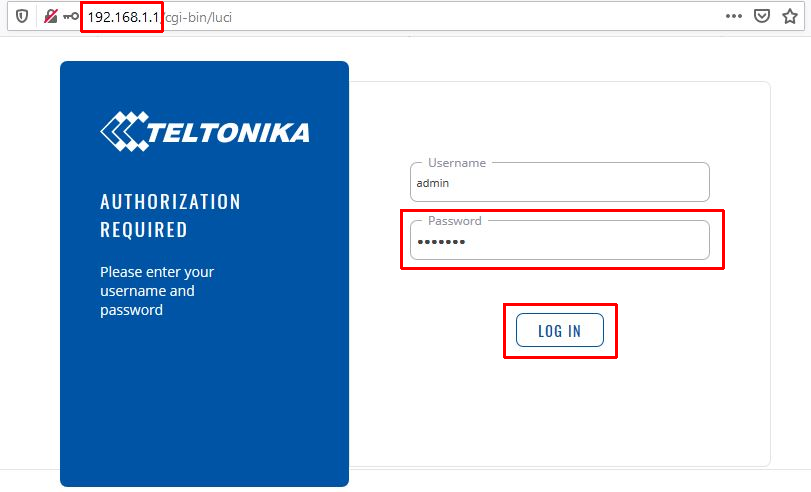

You must set a new secure password. Confirm with Submit.
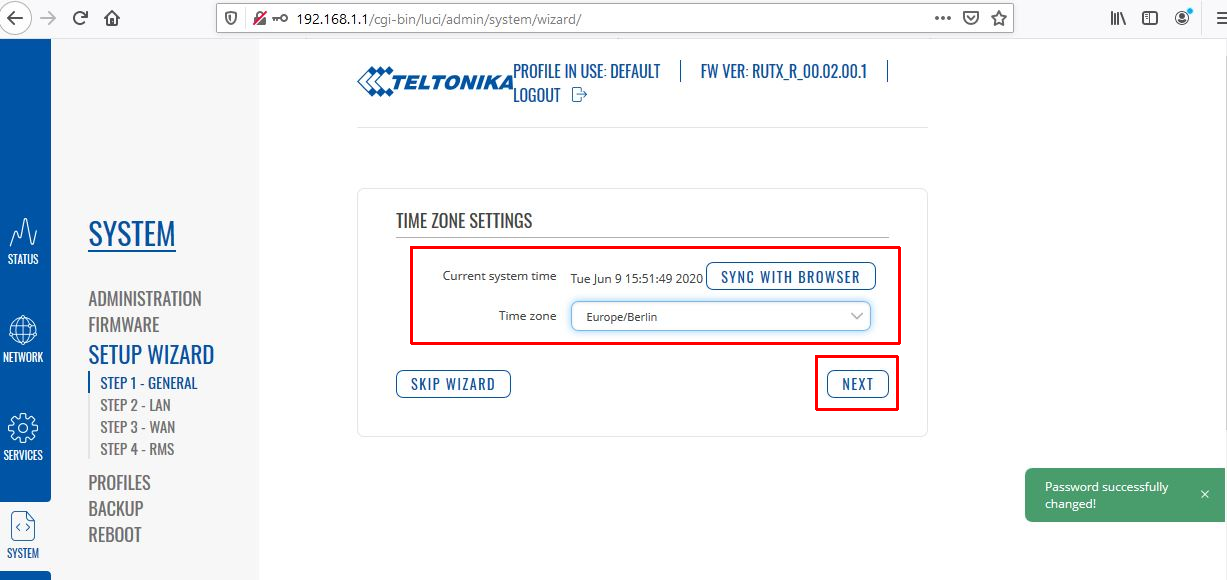
2. Quick Setup
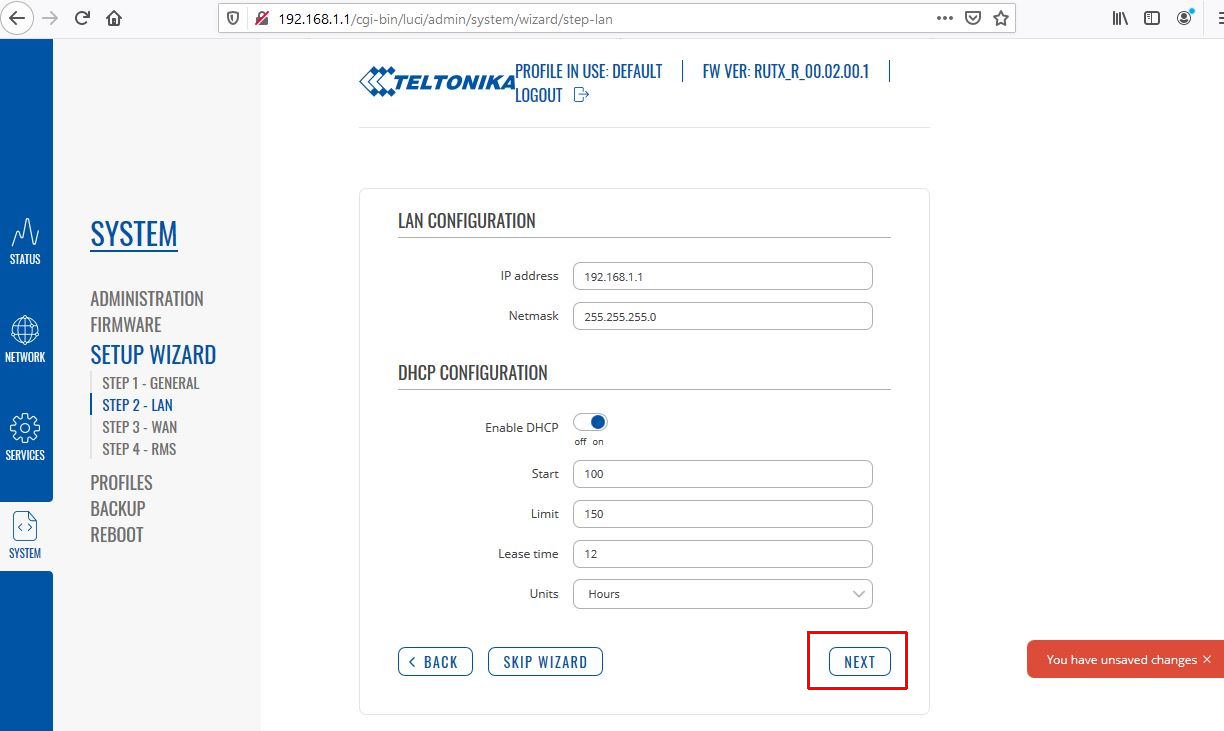
Select your time zone and confirm the LAN settings.
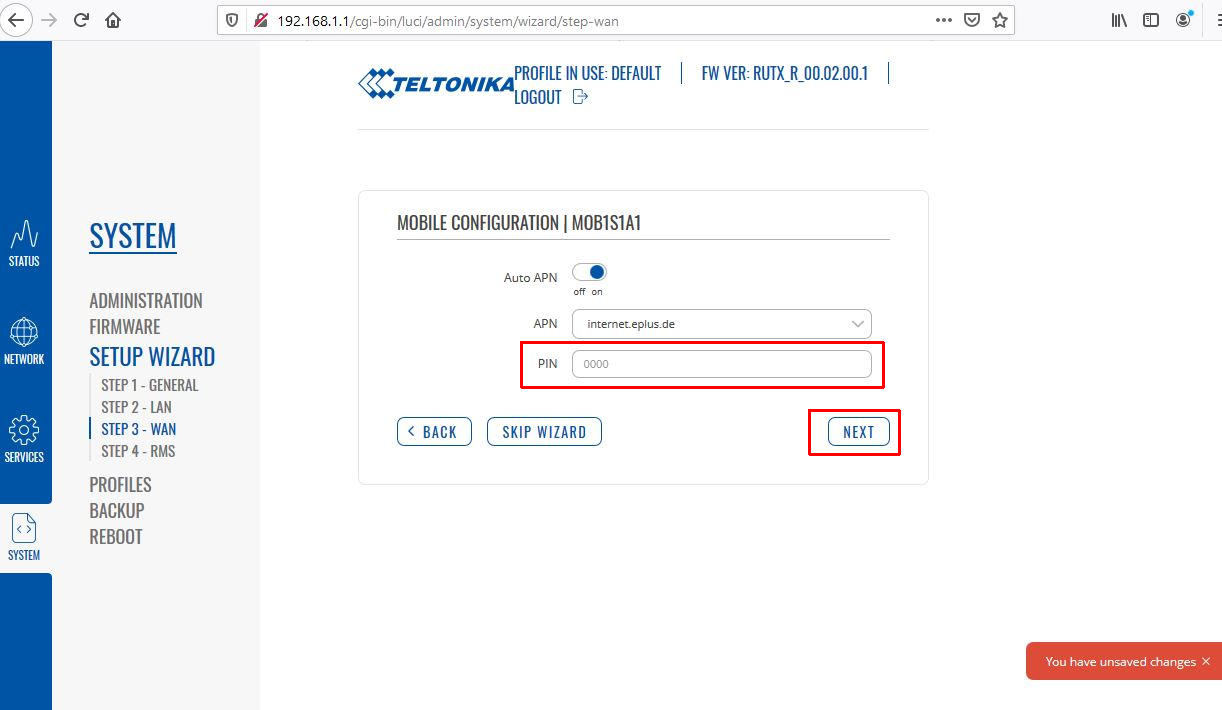
Enter the PIN for the SIM card. The "Auto APN" function should remain active.
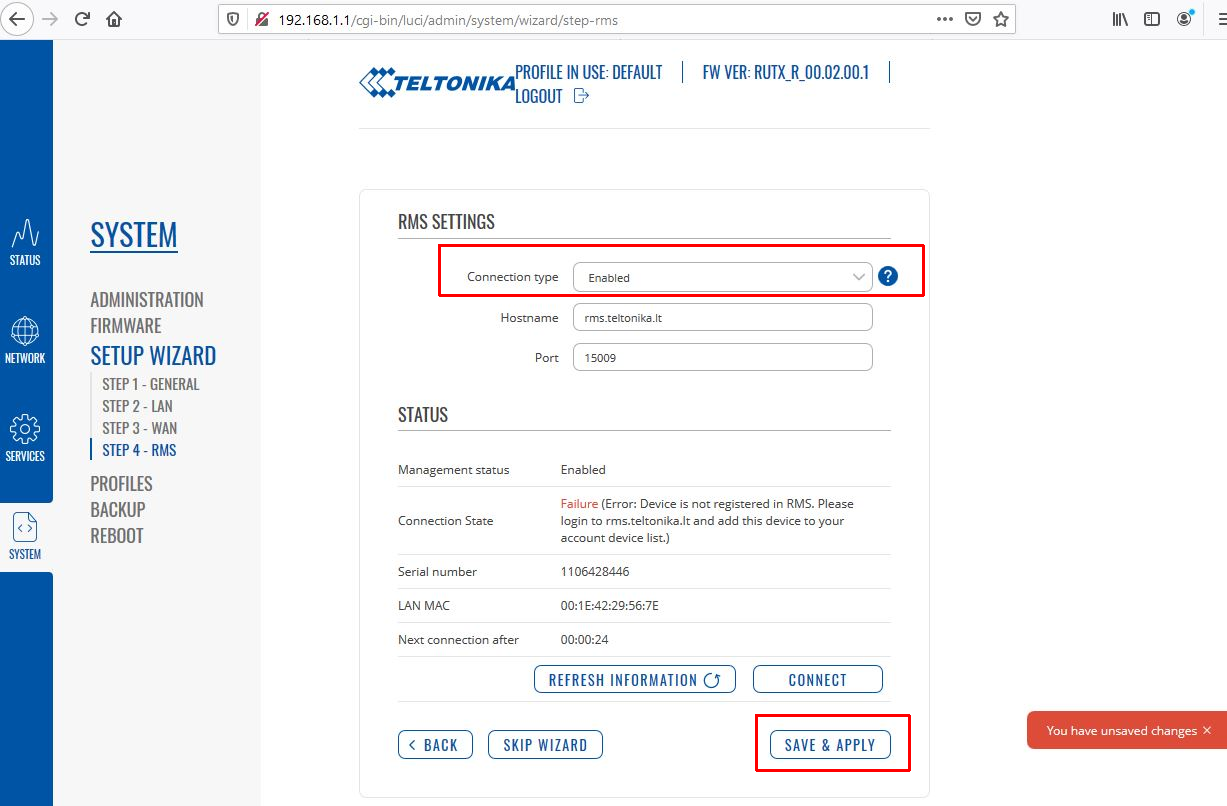
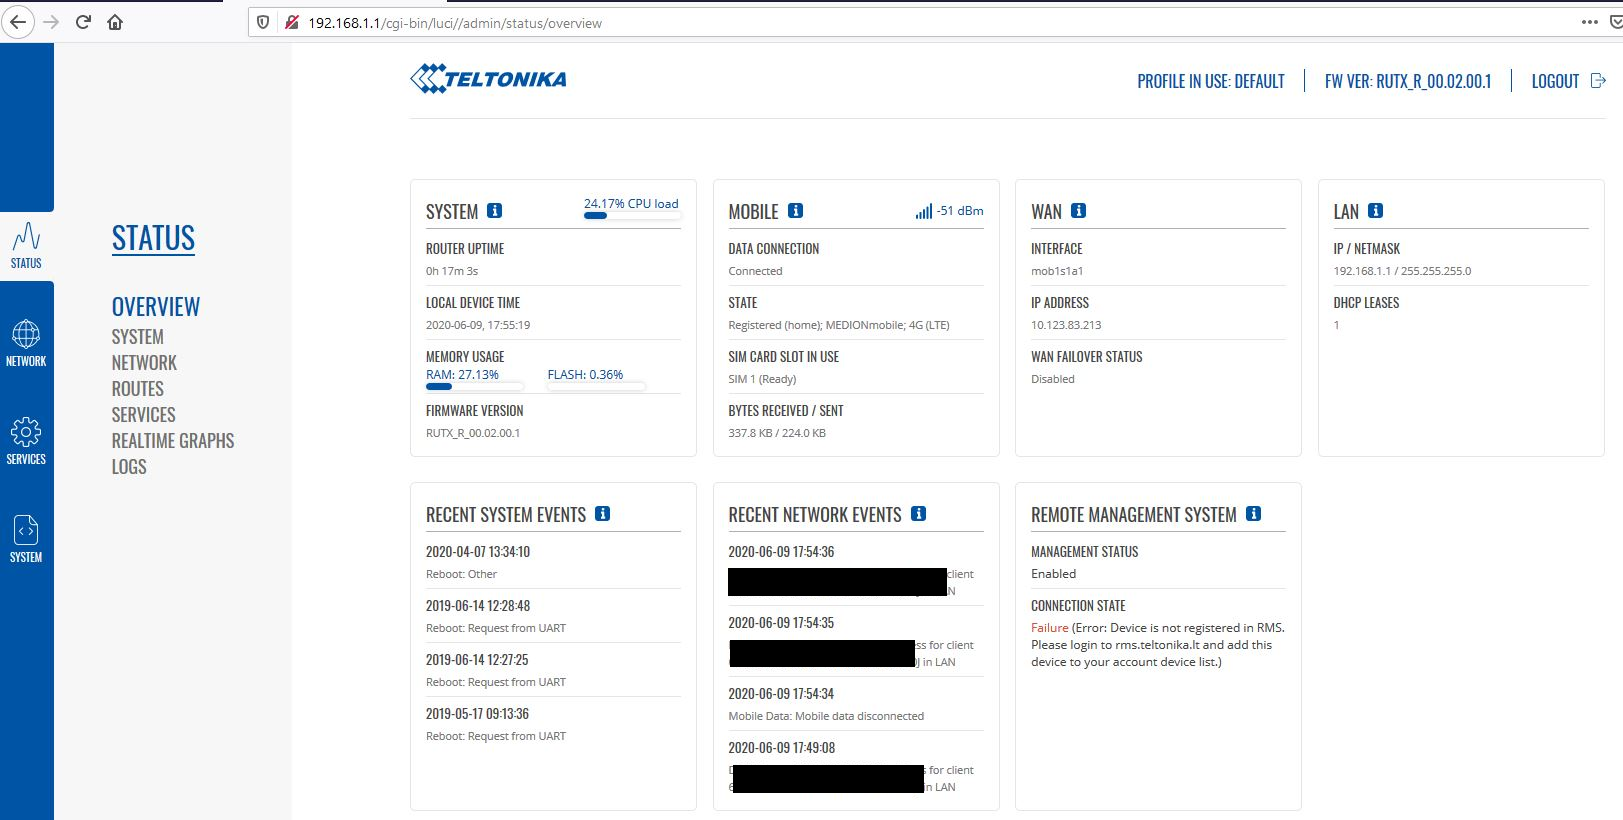
Complete the setup with SAVE & APPLY. The overview page will show your connection strength.
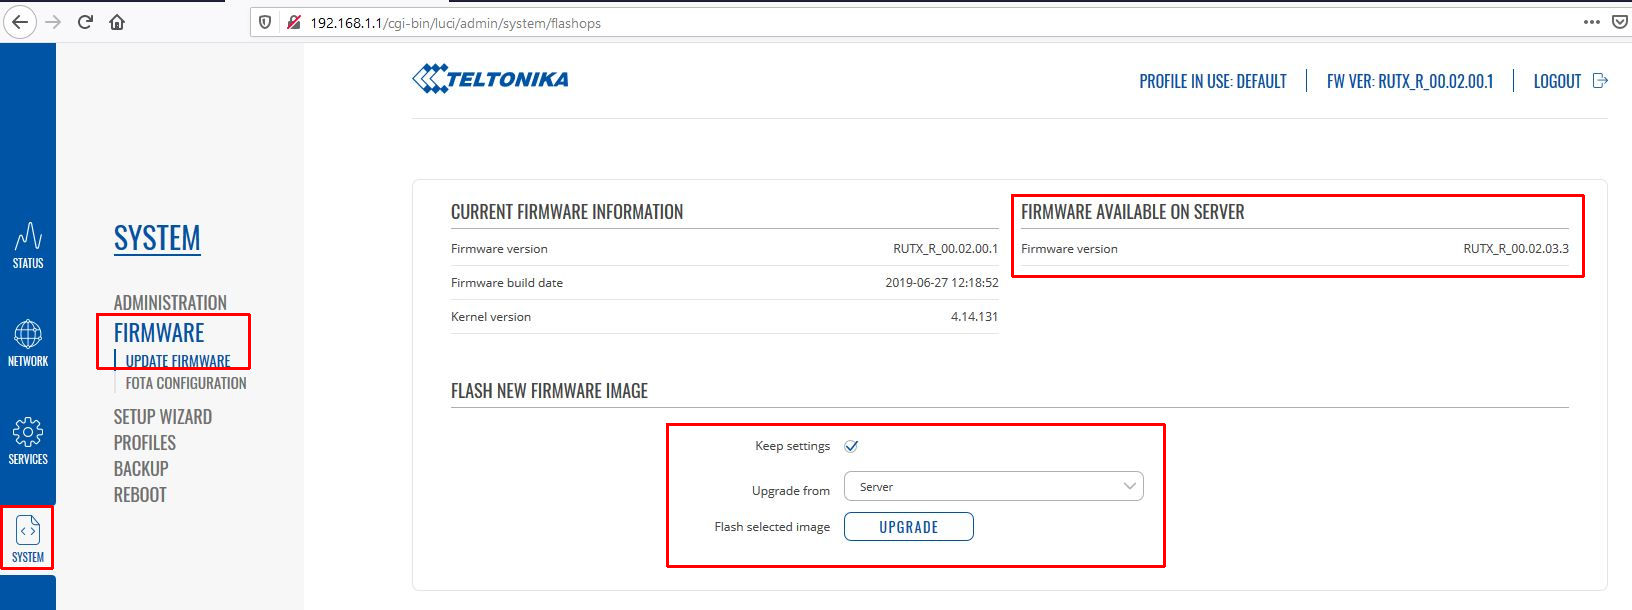
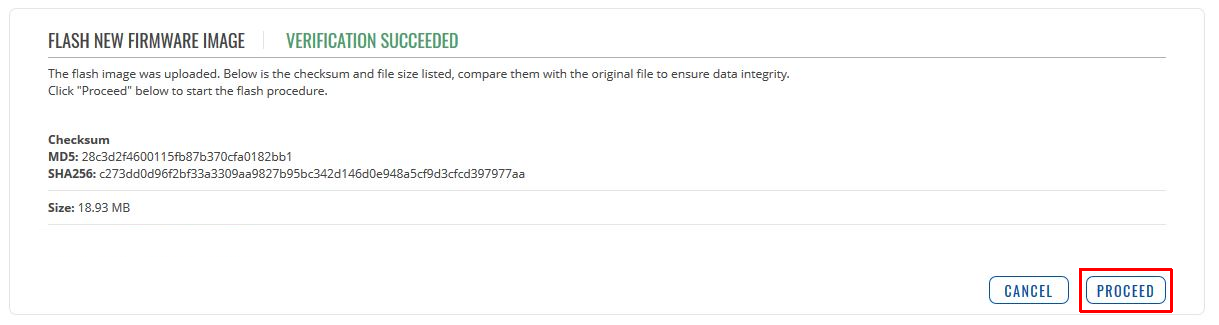
3. Firmware Update
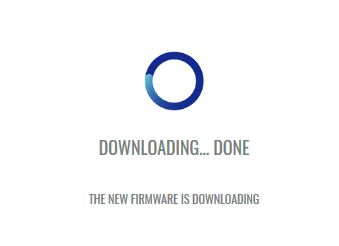
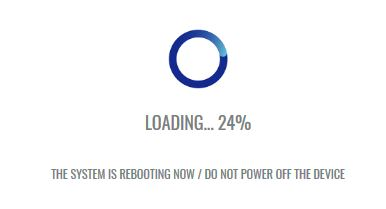
Under SYSTEM -> FIRMWARE, check if a newer version is available. Click UPGRADE to update the system (do not disconnect power!).
4. Using Two SIM Cards (Failover)
Navigate to NETWORK -> MOBILE -> GENERAL to set up both SIM cards.

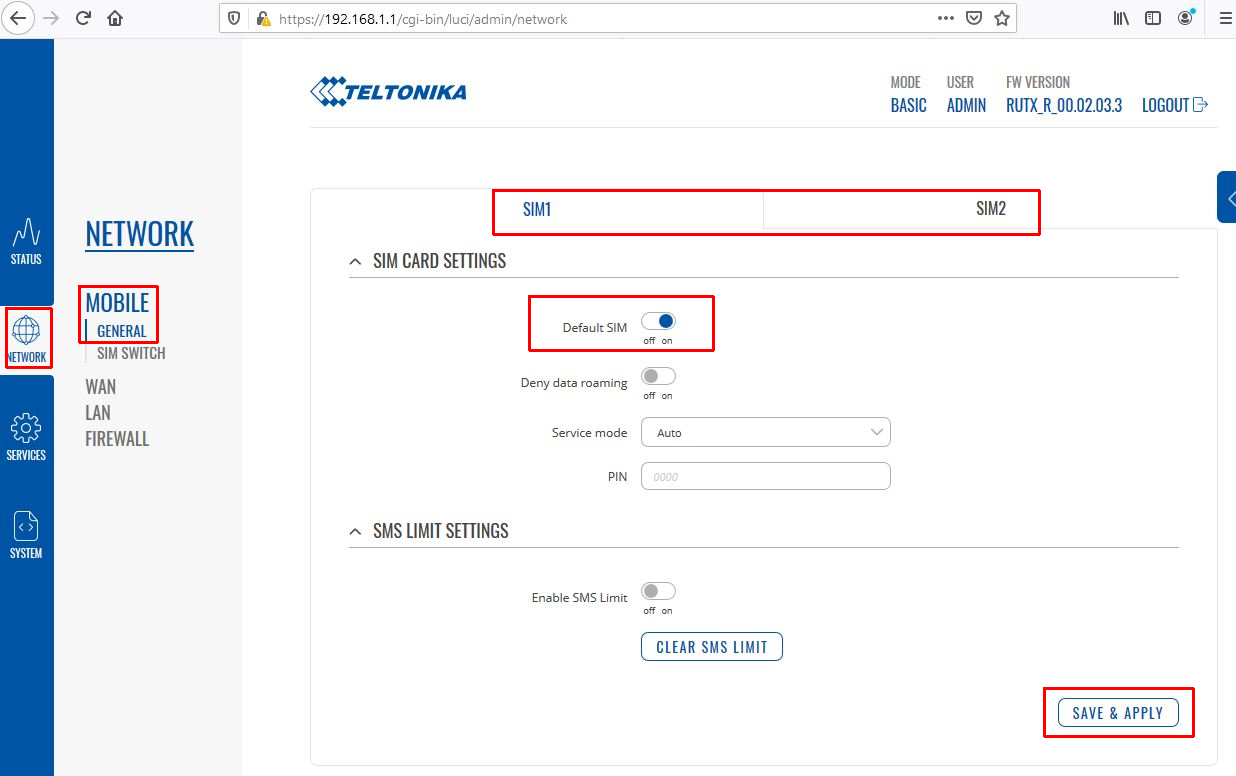
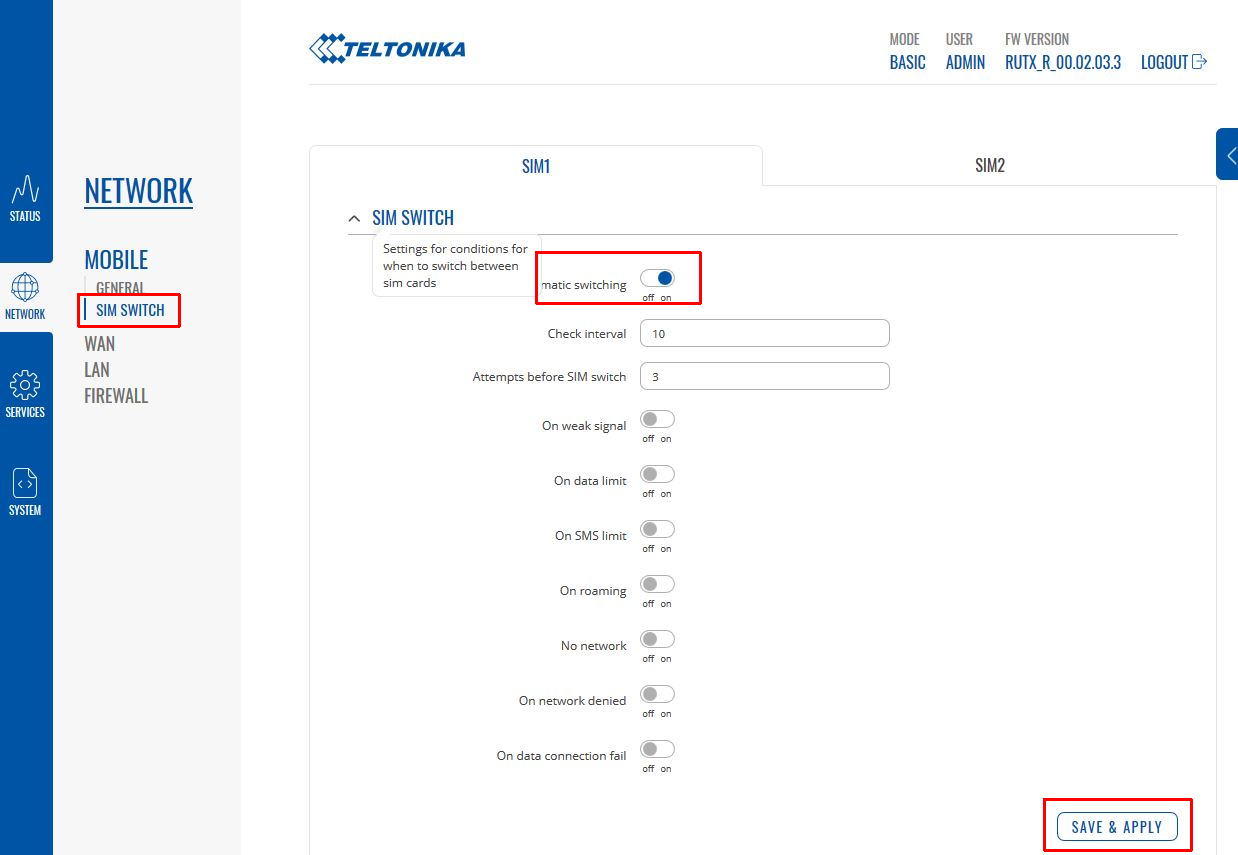
Under SIM SWITCH, you can set the router to automatically switch to SIM2 if the connection is lost.

FAQ: Teltonika RUTX09
Does the RUTX09 have WiFi?
No. Unlike models such as the RUTX11, the RUTX09 does not feature a built-in WiFi module. It is a dedicated LTE router for wired LAN networks.