


Updated: May 17, 2026 | Reading time: approx. 5 minutes
Below, we provide an illustrated step-by-step guide for configuring a Teltonika RUT230, RUT240, RUT900, RUT905, RUT950, or RUT955 as a 4G/LTE router (up to firmware 00.07.00).
1. Initial Login
Connect the Teltonika router to your computer using a network cable. Disconnect your PC from WiFi to avoid IP conflicts.
Open a browser and enter 192.168.1.1. The default username is admin and the password is admin01. Click Login.
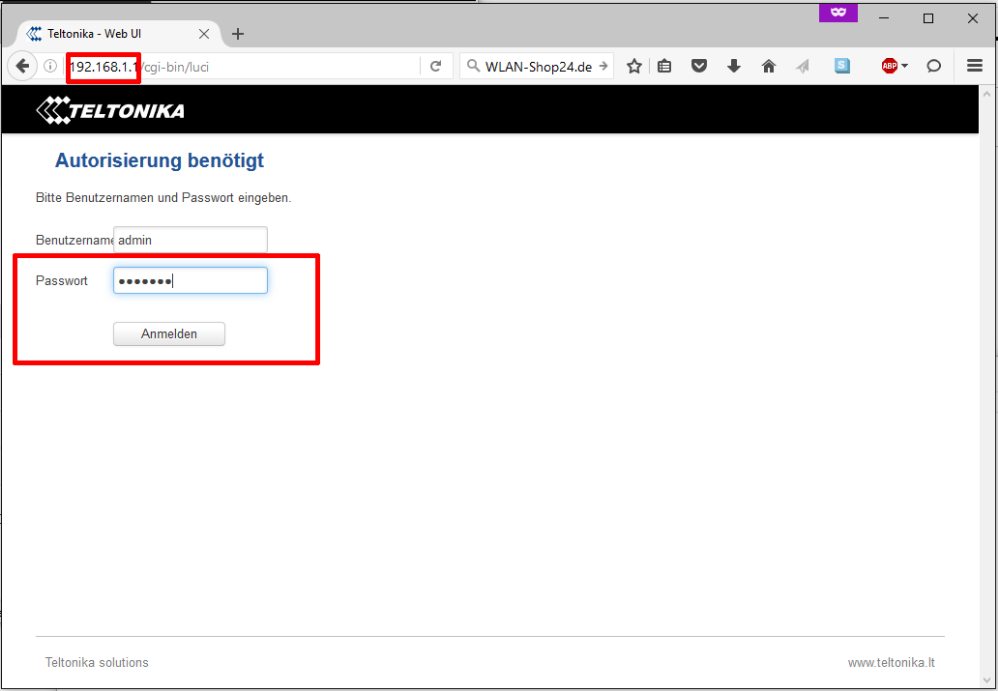
You can change the admin password now or click "Step 2 - Mobile" to proceed.

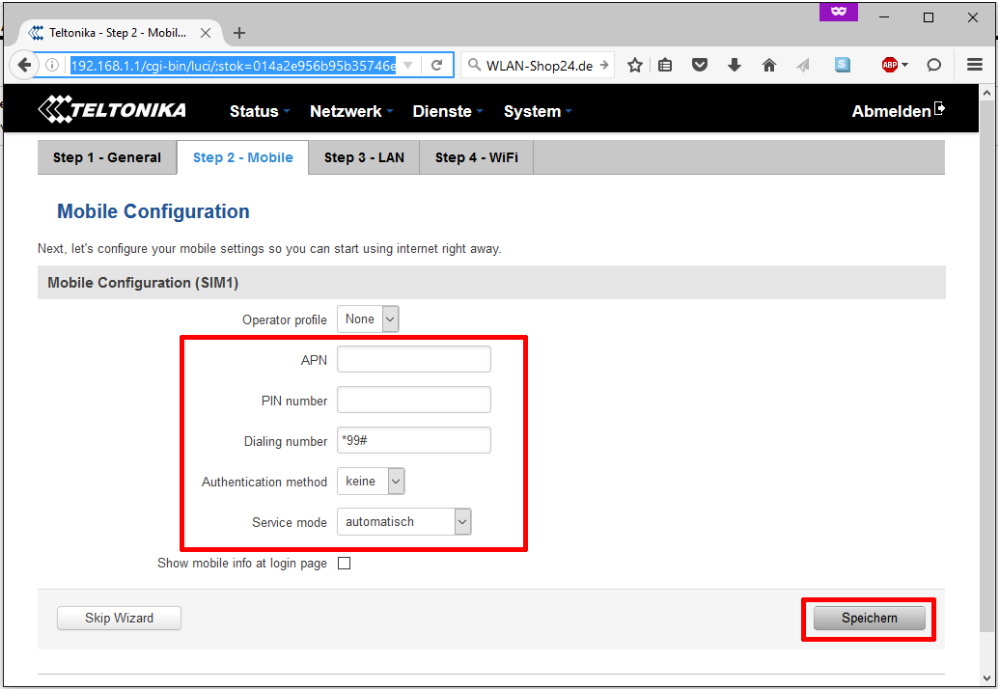
2. Configure SIM Card (APN)
Enter your SIM card details (APN, PIN). The Dialing number is always *99#. Set the Service mode to "automatic" or "LTE preferred".
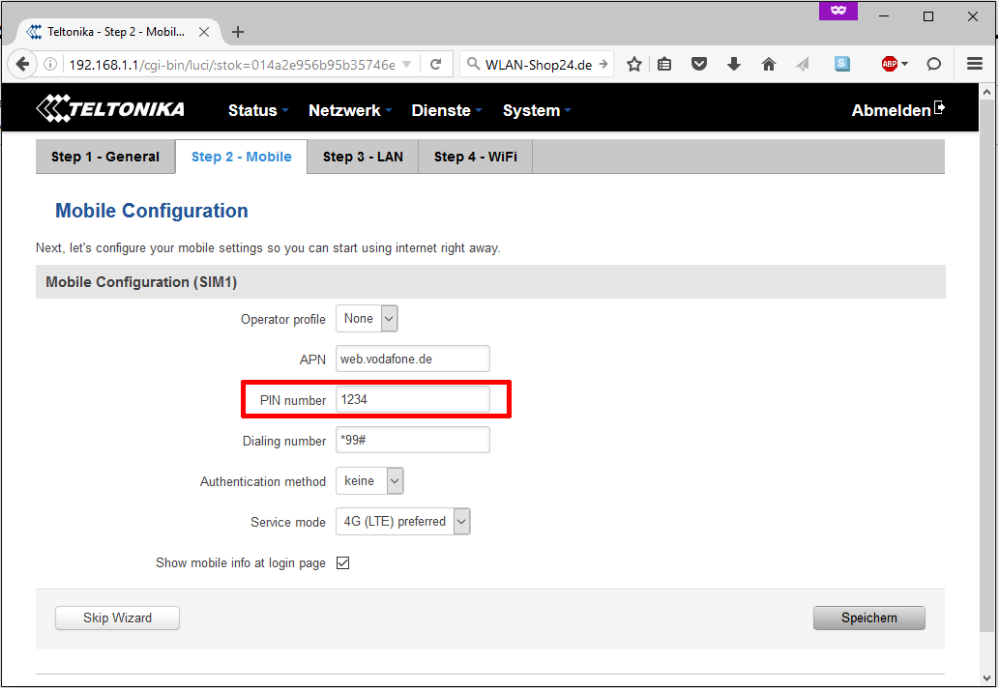
Example for Vodafone/1&1 (Enter your actual SIM PIN here):
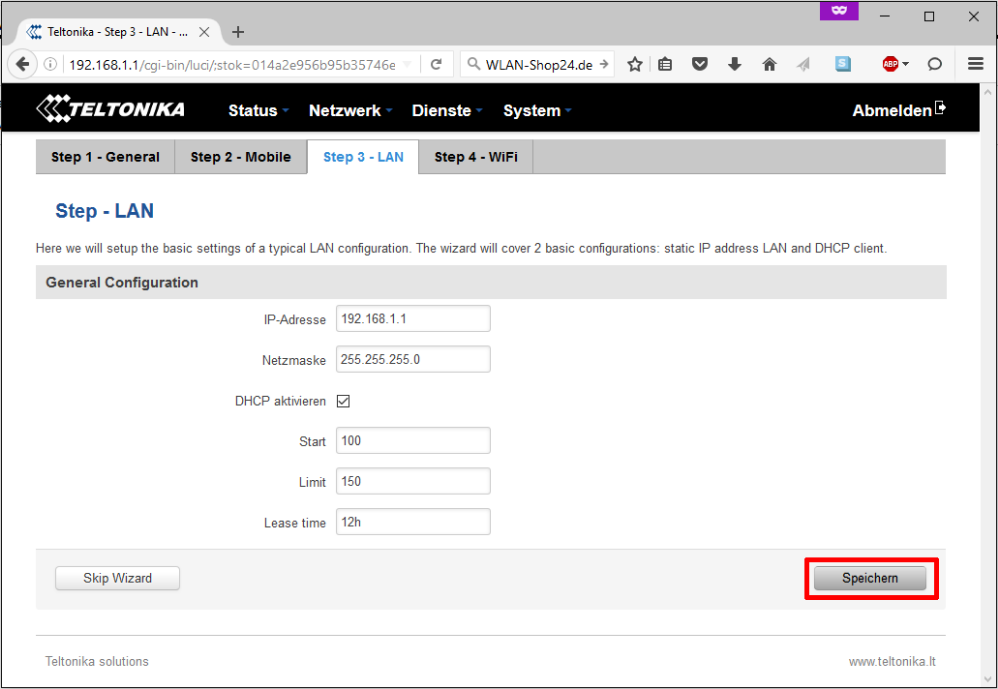
The LAN settings (192.168.1.1) can usually remain unchanged. Click Save.
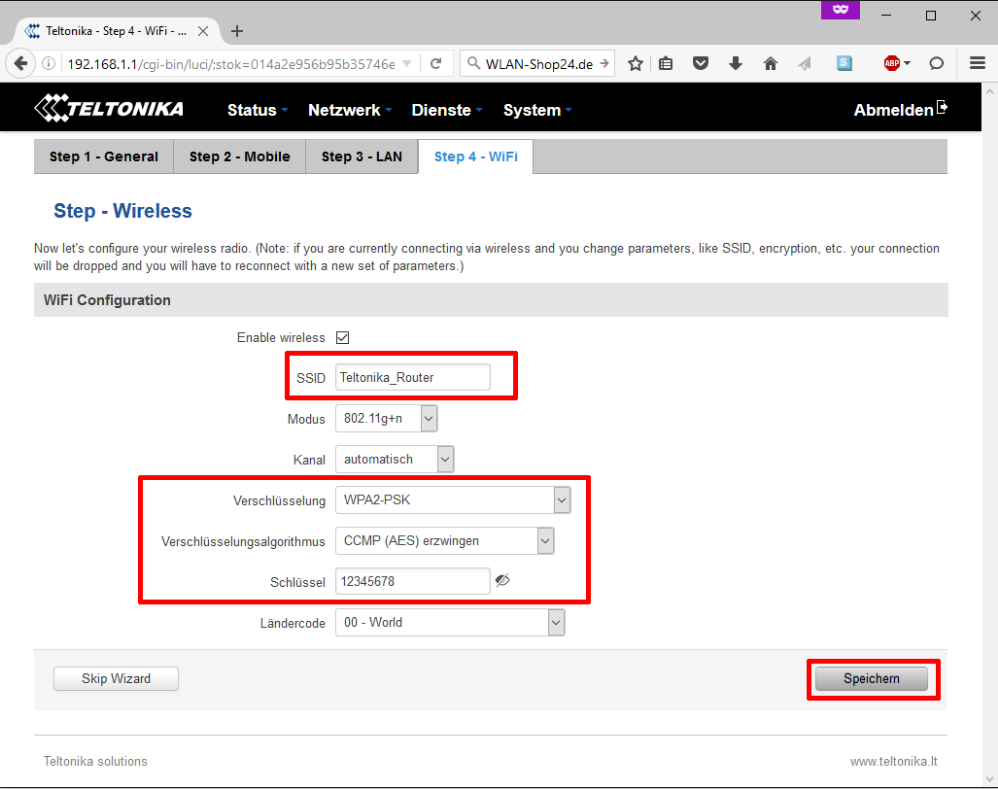
3. WiFi Configuration
Set your WiFi network name under ESSID. Enable WPA2-PSK encryption and enter a secure password under Key. Click Save and reboot the router to get online!
FAQ: Teltonika RUT240/RUT950
How can I improve the LTE signal?
Teltonika routers feature detachable SMA antennas. To massively boost your reception, we recommend using a high-performance external 4G/LTE antenna.