Updated: May 17, 2026 | Reading time: approx. 6 minutes
The ALFA R36 and its successor, the R36A, are absolute classics when it comes to capturing a distant WiFi signal at a campground and rebroadcasting it as a private home network inside your RV.
Step 1: Connecting Hardware & Login
- Plug your ALFA USB WiFi adapter into the USB port of the ALFA R36 / R36A and connect it to power.
- Connect your device to the open WiFi network "ALFA_AP", open a browser, and enter 192.168.2.1 (Username/Password: admin).
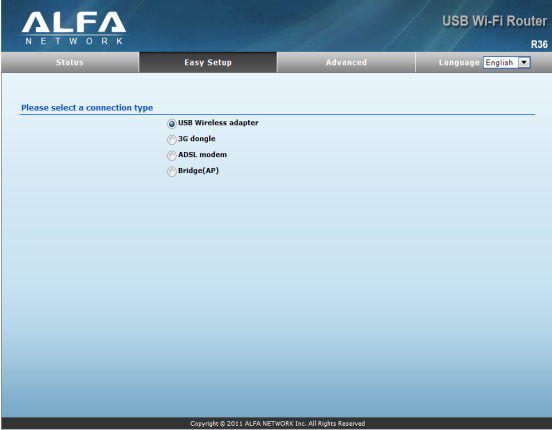
Step 2: Easy Setup Guide
In the configuration interface under the "Easy Setup Menu", select the option "USB Wireless Adapter".
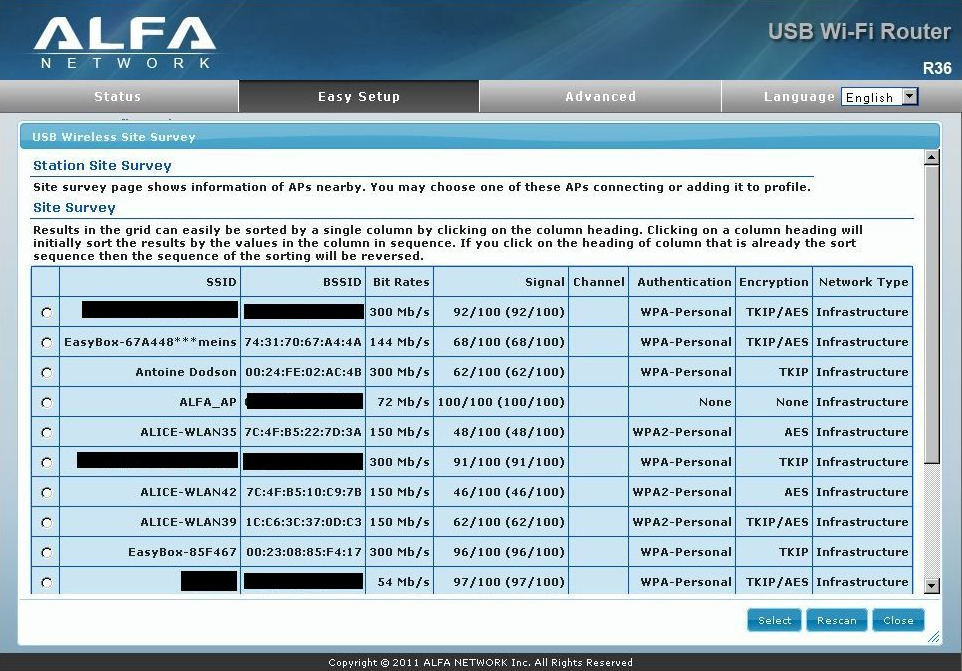
Click on "Site Survey" to search for available WiFi networks.

Select the desired network and click "Select".

Special Case: Campground Hotspots (Captive Portals)
If the network shows None under Encryption, leave the field blank, click Select, and click Next. Enter your voucher credentials directly into your browser at the very end!
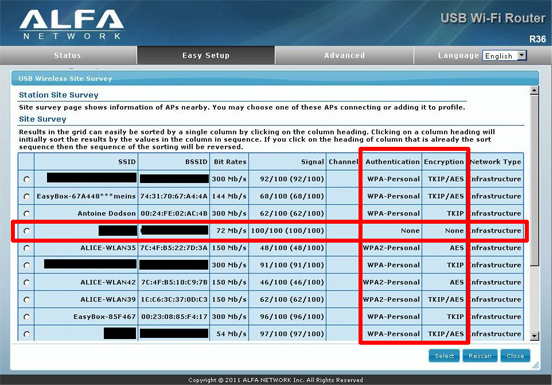
If the network is encrypted, enter the password under Passphrase and click "Next".
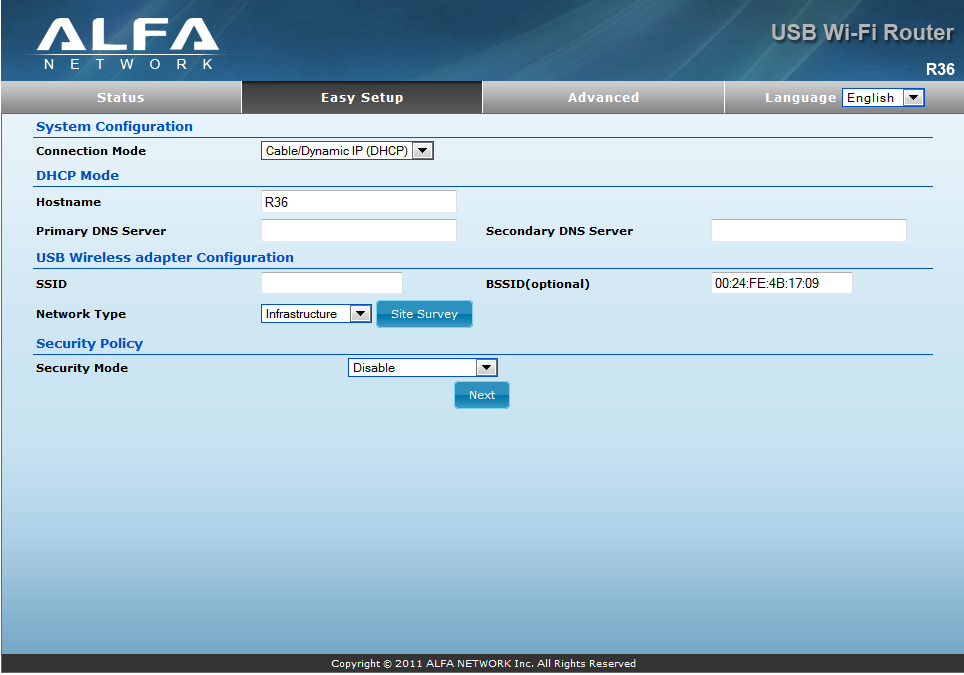
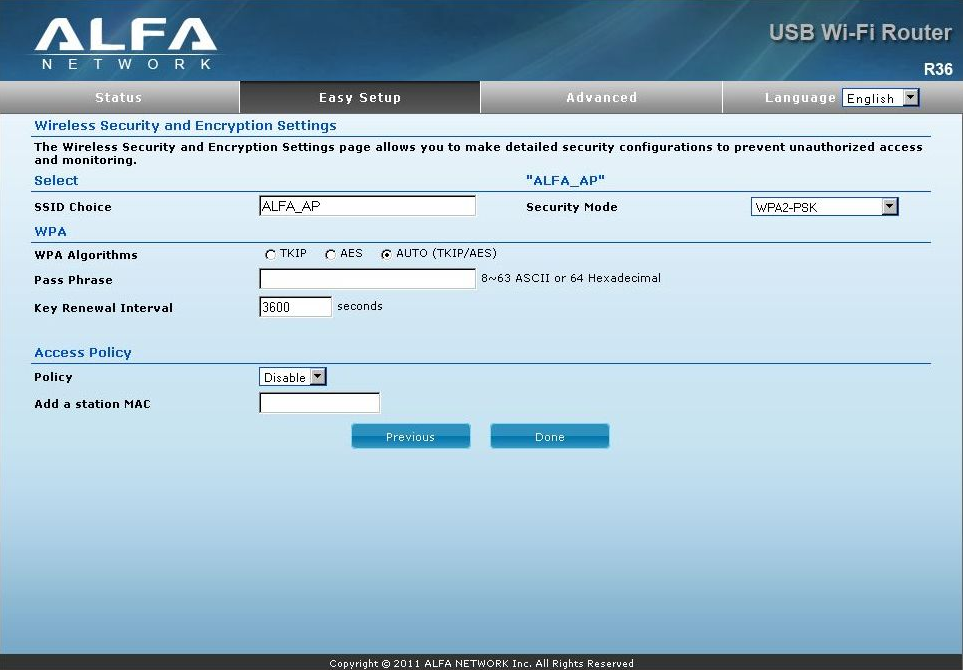
Configure your personal WiFi name and password. Choose "WPA2-PSK", enter your security key, and complete the setup by clicking "DONE".
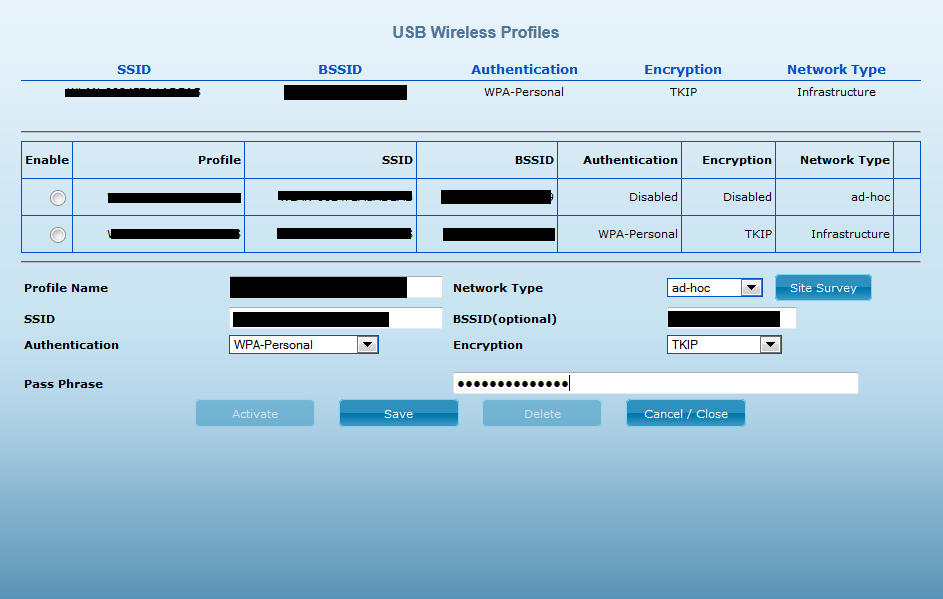
Changing Locations: Connecting to a New WiFi Network
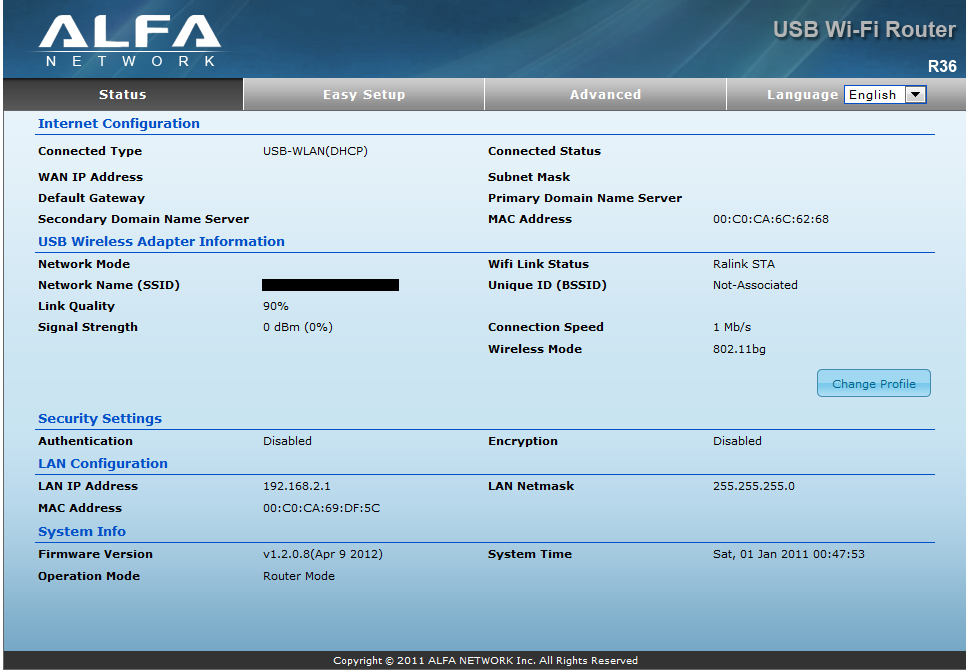
When changing locations, simply click on "Change Profile" in the main menu.
Click on "Site Survey".
Select the new WiFi network at your current location and click "Select".
Enter the password under Pass Phrase, click "SAVE", and then click "Activate/Save".