


Updated: May 17, 2026 | Reading time: approx. 6 minutes | Expert guide for Ubiquiti airOS
Below, we provide an illustrated guide for installing and configuring two Ubiquiti NanoStation, NanoBeam, PowerBeam, or LiteBeam components as a WiFi bridge. The steps are identical for all airOS models (whether 2.4 GHz, 5 GHz, or ac).
1. Configuration of the First Station (Access Point)
- Connect the first Ubiquiti device to your PC via an Ethernet cable (using the PoE injector).
- Assign a static IP address to your network card from the device's subnet (default IP is 192.168.1.20). For example, assign 192.168.1.10 to your PC.
- Open a browser and go to 192.168.1.20.
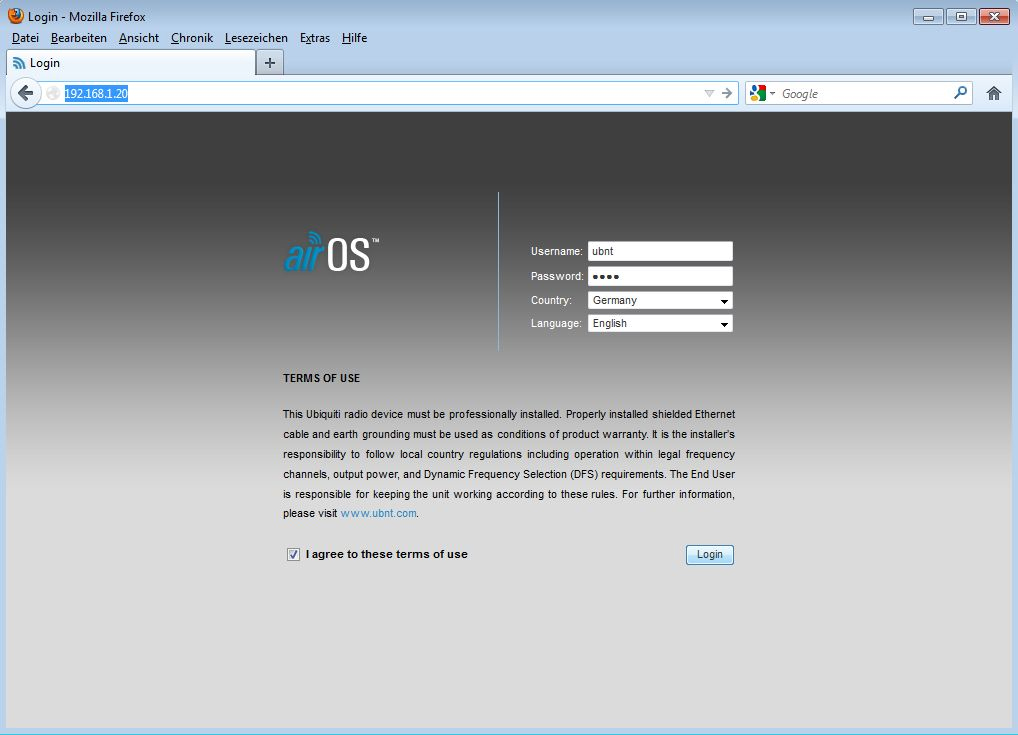
Log in (Username: ubnt / Password: ubnt). Select your country and language, then log in.
Configure Wireless Settings
- Switch to the Wireless tab.
- Wireless Mode: Select Access Point WDS.
- SSID: Enter a network name for your bridge.
- Frequency: Choose a fixed channel starting at "5500" for full 1000mW transmission power.
- Security: Select WPA2-AES with PSK and enter your password.
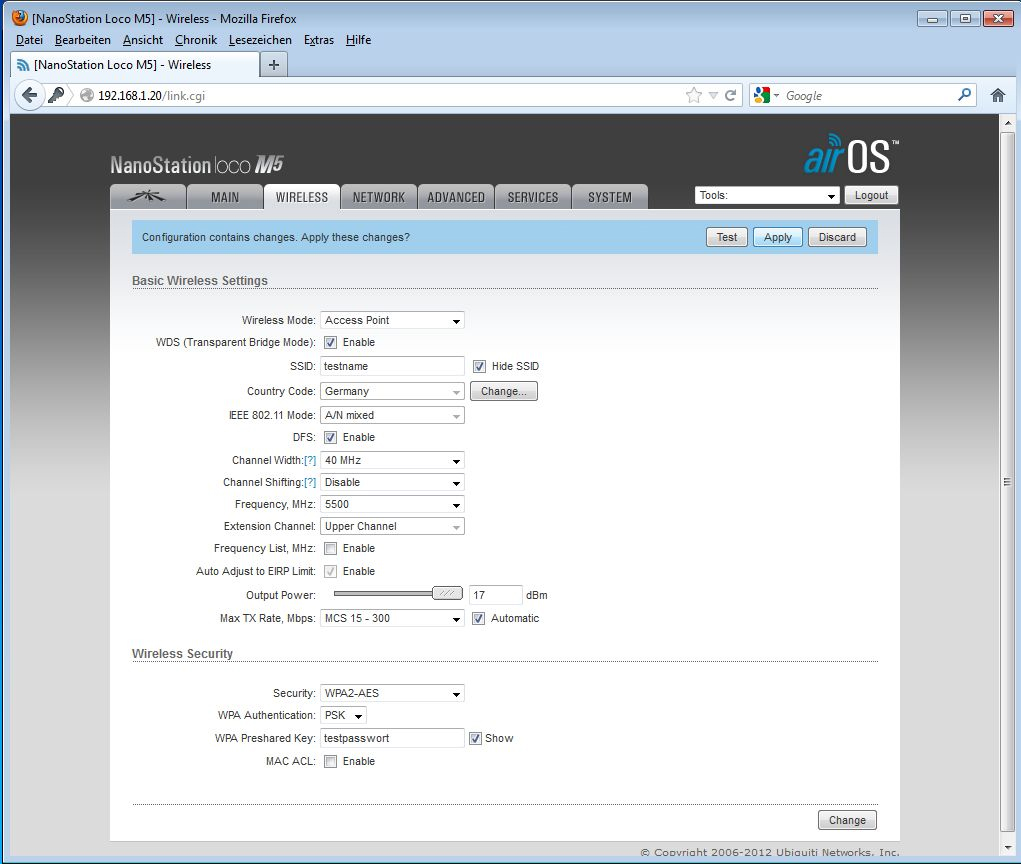
Click Change and then Apply.
Adjust Network Settings
Switch to the Network tab. Adjust the device's IP address according to your network (e.g., 192.168.1.2). In the Gateway field, enter the IP address of your router (e.g., 192.168.1.1).

Click Change and then Apply.
2. Configuration of the Second Station (Station/Client)
Now connect the second device to your PC and log in at 192.168.1.20 again.
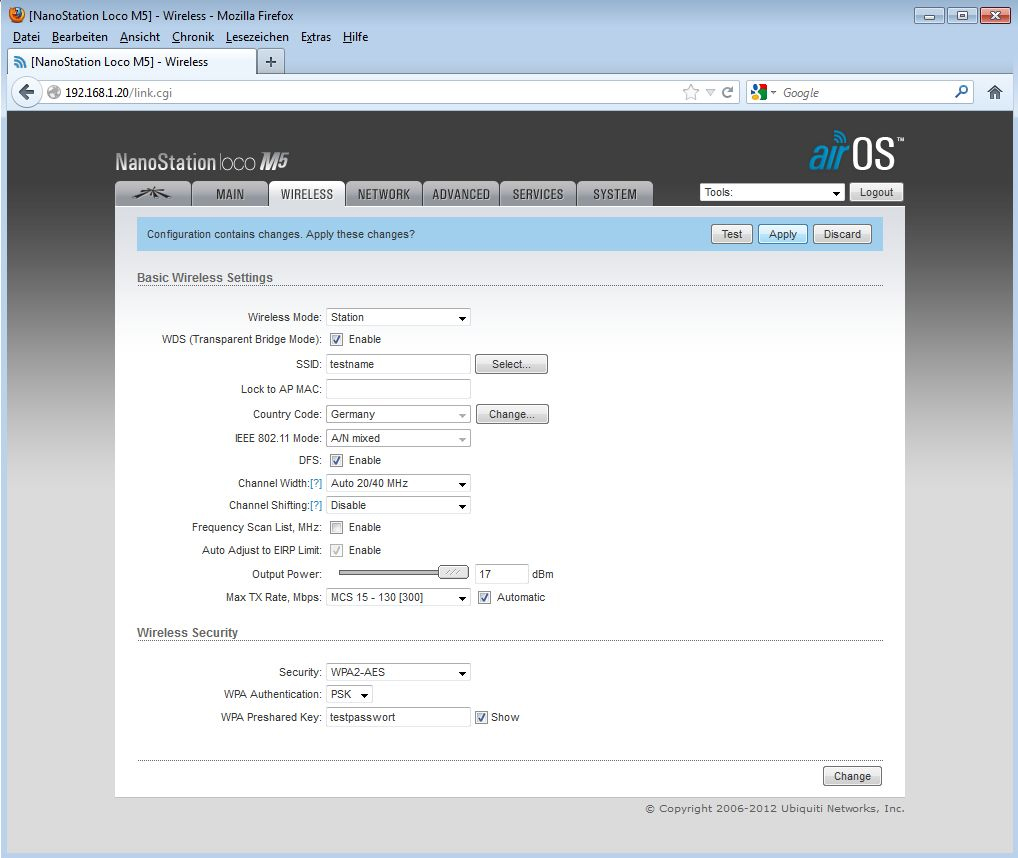
- Go to the Wireless tab.
- Wireless Mode: Select Station WDS.
- Enter exactly the same SSID and WPA2 Key that you used for the first device.
Then switch to the Network tab and adjust the IP address (e.g., 192.168.1.3) and Gateway.
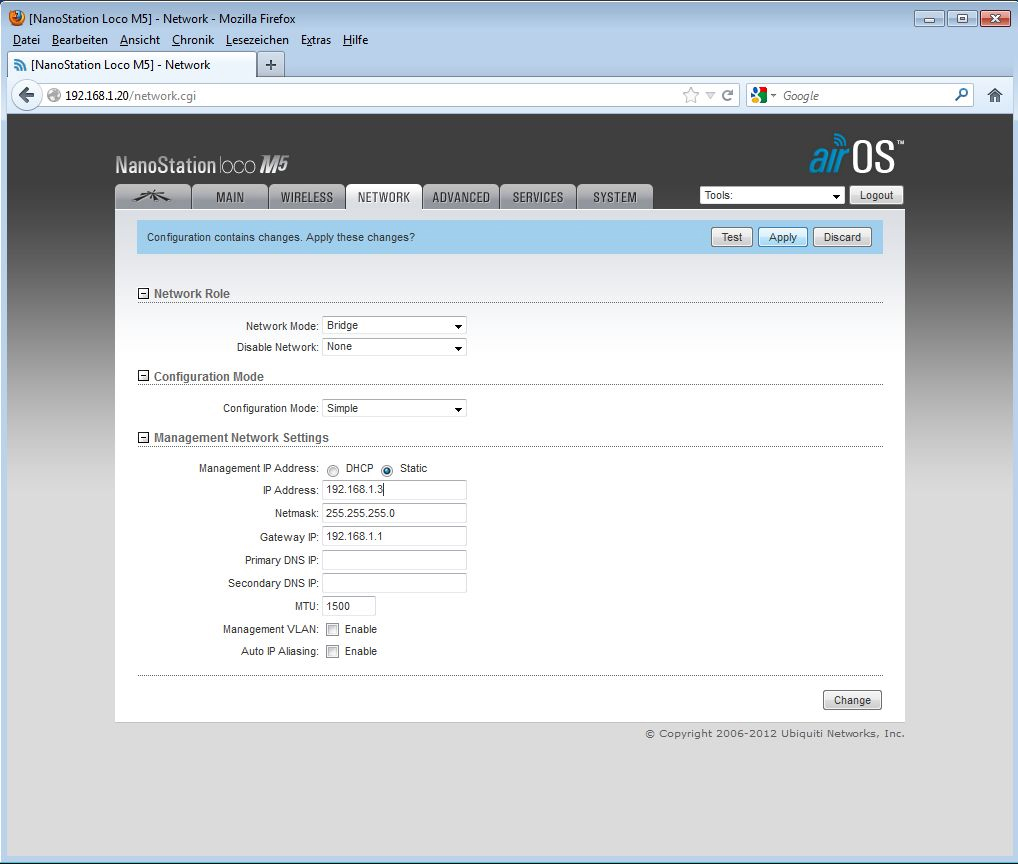
Click Change and Apply. Remember to activate the airMAX protocol on both devices in the far left menu for optimal performance.